When a Water Sprinkler stops working, the cause may be simple, but the symptoms can mislead you. A dry lawn does not always mean the sprinkler head has failed. The controller may have lost its schedule, a valve may remain closed, or a clogged nozzle may restrict the spray. Low water pressure can also make several zones appear weak at the same time.
Start with visible clues. Check whether the controller display is active and whether the affected zone turns on. Listen for a valve clicking near the irrigation box. Inspect the sprinkler head for soil, grass, or small stones blocking its nozzle. A damaged wire, broken riser, or leaking fitting may leave wet ground beside an otherwise dry area. Small details matter.
Safety matters too.
Turn off the irrigation supply before opening fittings or handling wiring. Manufacturer instructions should guide electrical checks, valve replacement, and pressure adjustments. A multimeter can help confirm power, but uncertain readings should not be guessed. Professional irrigation technicians can test voltage, flow, and valve performance with suitable equipment.
Troubleshooting is not always tidy. One clogged head may hide a larger pressure problem. A controller reset may restore operation briefly, then fail again. Keep notes about which zones work, when the problem began, and what changed recently. This practical record helps separate a blocked nozzle from a failing valve or damaged control cable. Reliable diagnosis comes from testing each possibility carefully, rather than replacing parts too quickly.
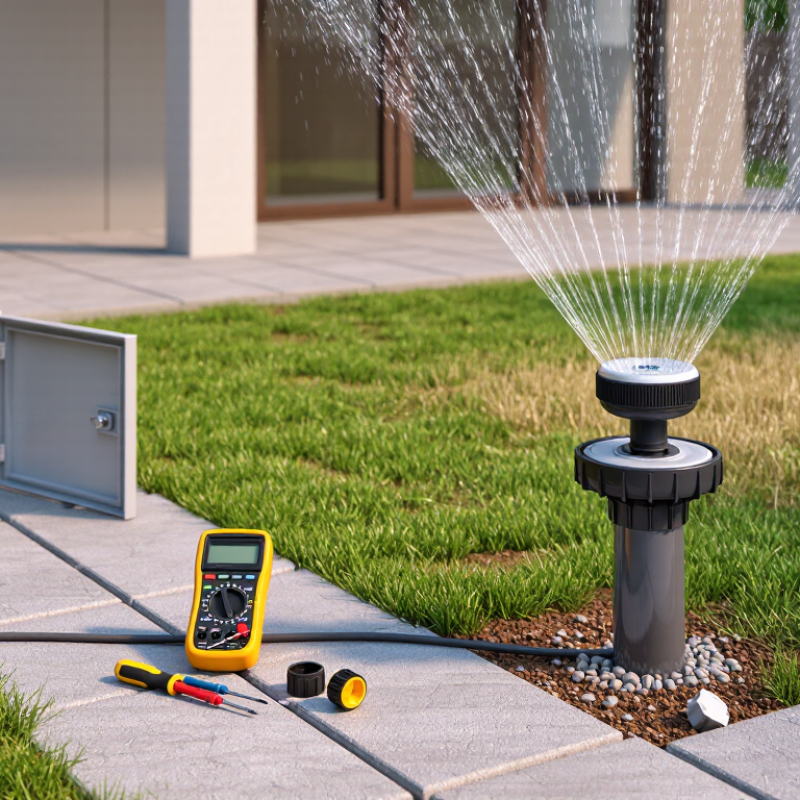
Why Is My Water Sprinkler Not Working?
A water sprinkler can stop working for several ordinary reasons. A closed shutoff valve is often the simplest cause. Check the valve near the water supply before examining electrical parts. A clogged filter or nozzle can also restrict flow. Look for grit, mineral buildup, or small insects inside the openings. Clean each part carefully with water and a soft brush. Avoid forcing a blocked nozzle, since delicate components can crack.
Low water pressure may affect only one zone or the entire system. A damaged pipe, loose connection, or hidden leak can waste pressure underground. Wet soil near a sprinkler head is a useful clue. The controller may also have incorrect schedules, a weak backup battery, or a tripped circuit. If one zone remains completely dry, its valve, wiring, or solenoid may need testing. Turn off electrical power before opening connections. I once blamed a broken valve, but the real problem was a disconnected wire. A quick guess can waste an afternoon.
Tips: Check the water supply, controller settings, filter, and visible heads in that order. Take a photo before removing wires or fittings. Replace cracked parts with matching specifications. If wiring, pumps, or underground leaks remain uncertain, consult a qualified irrigation technician. Their measurements can prevent unnecessary digging and repeated repairs.
Why Is My Water Sprinkler Not Working?
How to Check the Sprinkler’s Water Supply
When a sprinkler stops spraying, check the water supply before adjusting the timer. I once blamed the controller, but a partly closed valve caused the problem. Locate the main irrigation shutoff valve and turn it fully open. Move it gently. Forcing an old valve can damage the stem or create a leak.
Next, inspect the backflow device, supply pipe, and nearby filter. A clogged filter may leave only a weak trickle. Look for wet soil, dripping joints, or hissing sounds near buried pipes. These signs can indicate a hidden leak. Open one sprinkler zone and observe the pressure. Strong pressure at the valve but poor flow at the heads suggests a blockage or damaged pipe. Low pressure everywhere may point to a closed household valve or a wider supply issue.
Tips: Check the water meter while every fixture is off. If it still moves, water may be escaping underground. Clean removable filters carefully, and replace cracked screens. I sometimes skip this simple test when I am in a hurry. That usually wastes time. Keep electrical controls dry while inspecting nearby plumbing, and ask a qualified professional to assess persistent leaks or unstable pressure.
| Inspection Point | How to Check It | Normal Condition | Possible Problem | Recommended Action | Priority |
|---|---|---|---|---|---|
| Water supply valve | Locate the main irrigation shutoff valve and confirm that the handle is aligned with the pipe when using a quarter-turn valve. | The valve is fully open and the pipe is not restricted. | A partially closed or closed valve can stop water from reaching every zone. | Open the valve slowly. If it will not turn or leaks around the stem, arrange for professional repair. | High |
| Backflow prevention assembly | Check the irrigation backflow device for visible leaks, damage, or closed test and isolation valves. Do not remove its protective caps. | Isolation valves are open, with no continuous leakage or visible damage. | A closed valve, failed check assembly, or leak may reduce or interrupt flow. | Open only the normal isolation valves if clearly identified. Contact a qualified irrigation or plumbing professional for repairs or testing. | High |
| System pressure | Observe the pressure gauge, if installed, while a sprinkler zone is running. Compare the reading with the irrigation system’s design requirements. | Pressure remains within the equipment manufacturer’s specified operating range. | Very low pressure may indicate a supply restriction, leak, clogged filter, or undersized service. Excessive pressure can damage components. | Inspect for restrictions and leaks. Install or adjust pressure regulation only when the required pressure is known. | High |
| Water meter or supply indicator | Turn off indoor and outdoor fixtures, then check whether the water meter continues to register flow. | The meter is stationary when all water outlets are off. | Continued movement can indicate an underground irrigation leak or another plumbing leak. | Shut off the irrigation supply if a major leak is suspected and have the system inspected. | Urgent |
| Zone control valve | Activate one zone and listen near its valve box for a click or gentle water-flow sound. Check for standing water in the box. | The valve opens during the programmed zone and the valve box remains reasonably dry. | A stuck solenoid, damaged diaphragm, wiring fault, or flooded valve box may prevent operation. | Check the controller wiring and valve-box connections. Replace or repair the valve only after turning off the water supply. | High |
| Filter or screen | Inspect the system filter or pump intake screen if the system has one. Rinse removable screens with clean water. | The screen is clean and allows water to pass freely. | Debris can restrict flow and cause weak or uneven sprinkler operation. | Clean the filter according to the equipment instructions and reinstall it securely. | Medium |
| Sprinkler heads and nozzles | Run the affected zone and check for clogged nozzles, broken heads, tilted bodies, or water spraying from the head seal. | Heads rise fully, spray evenly, and retract or drain normally after the zone stops. | Blocked nozzles cause poor coverage; broken heads can waste water and lower pressure across the zone. | Clean or replace damaged components. Use a nozzle designed for the same flow and spray pattern. | Medium |
| Underground pipe or tubing | Look for unusually wet soil, erosion, sinkholes, bubbling water, or water flowing when the system is off. | No unexplained wet areas or continuous flow are present. | A cracked pipe or disconnected fitting may cause pressure loss and poor sprinkler performance. | Turn off the affected zone or main irrigation supply and repair the damaged section. | Urgent |
| Controller schedule and manual start | Use the controller’s manual-start function to run the affected zone. Confirm the program is enabled and seasonal adjustments have not reduced watering time to zero. | The zone starts when manually activated and the programmed run time is greater than zero. | A disabled schedule, incorrect date or time, rain-delay setting, or seasonal adjustment can make the system appear inactive. | Correct the controller settings and replace the backup battery if the time or program is repeatedly lost. | Medium |
| Electrical power and valve signal | Confirm the controller has power and inspect the low-voltage wiring for loose, cut, or corroded connections. | The controller display is active and the selected valve receives the correct control signal during operation. | A tripped power supply, blown fuse, damaged wire, or failed controller output can keep a valve closed. | Disconnect power before handling wiring. Use a qualified technician for electrical testing when the fault is not obvious. | High |
| Pump and storage tank, if installed | Check that the pump has power, the tank contains water, and the pump intake is not blocked. Listen for abnormal noise. | The pump starts when required, remains primed, and supplies stable flow without overheating. | Loss of prime, an empty tank, blocked intake, or pump failure can stop water delivery. | Switch off the pump before clearing blockages. Follow the pump instructions or call a qualified service professional. | Urgent |
| Freeze or weather-related damage | Inspect exposed pipes, valves, and backflow equipment after freezing temperatures or severe weather. | Components are intact, with no cracks, splits, or water leaks. | Frozen water can expand and crack pipes, valves, and backflow assemblies. | Close the supply valve if leaking is present and replace damaged parts before restarting the system. | Urgent |
A dead zone often points to a valve, pipe, or head problem. Start with the valve box, not the sprinkler heads. Remove soil and leaves carefully. Check for standing water, cracked fittings, or a solenoid that clicks without opening. A silent solenoid may indicate wiring trouble or a failed coil. However, a clicking valve can still have a damaged diaphragm. That detail is easy to miss.
Inspect exposed pipes for splits, soft ground, or water bubbling after shutdown. Then run one zone and watch the pressure. Weak flow across every head may indicate a blocked valve or broken underground pipe. One weak head usually suggests a clogged nozzle, damaged riser, or misaligned filter. Turn off the water before removing parts. Small debris can travel farther than expected.
The U.S. Environmental Protection Agency reports that landscape irrigation uses nearly one-third of residential water, approaching 9 billion gallons daily. The U.S. Geological Survey’s Estimated Use of Water report recorded about 118 billion gallons withdrawn daily for irrigation nationwide in 2015. These figures make a small leak worth taking seriously. I would not replace every head immediately. My first inspection can be wrong, especially when low pressure hides a buried pipe break. Photograph each valve and mark wet areas before digging. A pressure gauge and a simple bucket flow test can expose assumptions that visual inspection misses.
When a sprinkler system stops, check the controller before digging up the yard. A dark display may indicate a tripped breaker, loose plug, or failed transformer. Turn off power before opening the cabinet.
Safety comes first.
Set the controller to manual mode and activate one zone. Listen for a soft click. Then inspect the low-voltage terminals for loose wires, corrosion, or broken copper. The common wire should sit firmly in its terminal.
A digital multimeter can measure voltage between the common terminal and the zone terminal. Many systems show around 24 volts AC during operation, but confirm your controller’s specifications.
No voltage usually points to the controller, fuse, transformer, or wiring. Voltage at the controller but not the valve suggests a damaged field wire.
At the valve, disconnect power and measure the solenoid’s resistance. A very high or zero reading can indicate a failed coil.
I once blamed a valve, but a loose common wire caused every zone to fail. It was an easy mistake. Recheck each connection slowly.
Do not test mains wiring yourself; a licensed electrician should handle it.
Dry connections matter. Moisture inside a controller can create intermittent faults that disappear before you can find them.
A sprinkler may stop because of a clogged nozzle, closed valve, damaged wire, or weak water pressure. Check the controller, then inspect the shutoff valve and visible pipes. If only one zone fails, the fault often lies in its solenoid, wiring, or a blocked nozzle. Clear small debris carefully and replace cracked heads. I have learned that guessing wastes water and time. Test one zone at a time, and note where pressure changes.
Repairing a simple nozzle or exposed fitting is reasonable for a careful homeowner. Turn off the water before opening any connection. However, call a professional when several zones fail, pipes leak underground, or the controller shows repeated electrical faults. Wiring near wet ground can create a serious shock risk. A professional can test voltage, locate hidden leaks, and check whether pressure problems come from the supply line. Local water rules may also require qualified work for certain connections.
Tips: Photograph the valve box before removing parts. Clean filters and nozzles gently. Do not force a stuck valve. If water pools near a valve box, stop the system and arrange an inspection. Keep a simple repair record with dates, symptoms, and replaced parts. It feels minor, but this record can reveal recurring failures. One mistake is replacing every sprinkler head before testing the valve. That approach looks productive, yet it may hide the real problem.
Update your browser to view this website correctly. Update my browser now